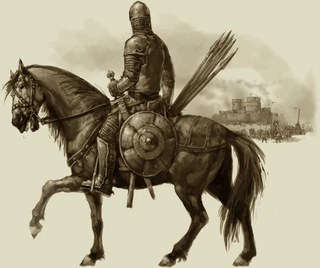
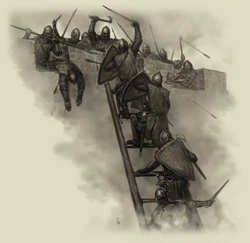
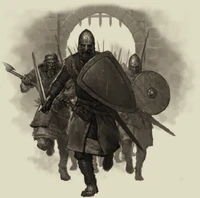
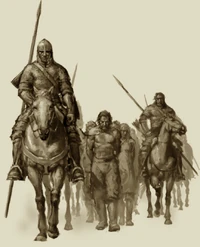
Sieges are an important aspect of every Mount&Blade game. The most common way for a faction to gain control of a fief is by besieging it (defections are the only alternative).
Since the game is designed so that no faction will ever conquer all of Calradia without the player's intervention, players are expected to participate in many sieges during a game. As a prerequisite, you will need to have a few men to besiege a fief - you are not even given the option if you don't have troops in your company at least equal to the number of the garrison.
While a fortification is under siege, some of the usual entry options will be unavailable.
Equipment[]
No special equipment is required for laying siege. However, to assault a fortification requires construction of ladders or siege towers. The siege equipment constructed is unique to the fortification and takes time based on your engineering skill to build.
If you do not want to assault it directly, you will have to wait until the residents surrender, usually from starvation (30 days in a castle and 100 days in a town). If sufficiently outnumbered, defenders may surrender immediately. Additionally, even waiting for a fortification's food to run out does not necessarily mean they will surrender, and, as this option takes a long time, it is not recommended.
The following table indicates time required to build siege equipment based on your Engineer skill. If a hero has a higher Engineer skill than you, it will go by their level, plus a bonus to their skill based on your current level.
| Engineer | Siege Ladders | Siege Tower |
|---|---|---|
| 0 | 9 Hours | 90 Hours |
| 1 | 8 Hours | 84 Hours |
| 2 | 8 Hours | 78 Hours |
| 3 | 7 Hours | 72 Hours |
| 4 | 6 Hours | 66 Hours |
| 5 | 6 Hours | 60 Hours |
| 6 | 5 Hours | 54 Hours |
| 7 | 4 Hours | 48 Hours |
| 8 | 4 Hours | 42 Hours |
| 9 | 3 Hours | 36 Hours |
| 10 | 2 Hours | 30 Hours |
| 11 | 2 Hours | 24 Hours |
| 12 | 1 Hour | 18 Hours |
| 13 | 0 Hours* | 12 Hours |
| 14 | 0 Hours* | 6 Hours |
Levels 11-14 are only attainable through the party skill bonuses.
*Although levels 13 and 14 claim "0 Hours" to build ladders, building them will take "less than an hour".
Assault[]
Depending on the number of troops involved, battles during an assault on towns or castles could take place in between one and four theaters. In rare cases, these battles may be repeated.
Defense[]
This is where the defenders inside the castle sally out to meet your assault. Often, they will appear close to you and may keep coming if the castle has a large garrison. This theater typically happens when the defenders greatly outnumber the attackers; it may be omitted if the town or castle has few defenders, or you may have to fight it several times if the garrison is large enough.
Attacking the walls[]
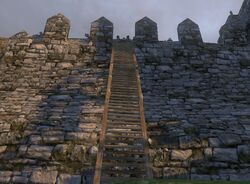
About to scale a siege ladder.
This theater is the main stage of a siege and the only battle phase that always occurs. This is where your ladders or siege tower come into play, and the defenders on the walls will constantly attack you and your troops while they charge up the ladders or siege tower and onto the walls.
An ideal way to win this stage is to bring your best ranged units, often Rhodok Sharpshooters, and your best melee infantry, often Nord Huscarls, to this stage. Use the Huscarl's shields for cover while the Sharpshooters pick off enemy archers on the walls. When the rain of arrows on your men have stopped, order your Huscarls to charge.
Streets[]
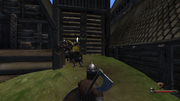
The fight in Wercheg's courtyard.
This battle only occurs in towns and may not happen if few defenders are left after the previous battle. You must go into the streets with some of your troops and defeat the defenders there. It is similar to when you get ambushed in a town. You will have about 5-6 defenders attacking you from all angles and about 4 soldiers backing you up.
Keep[]
The final battle takes place in the keep. You and 3 other men will lead the attack.
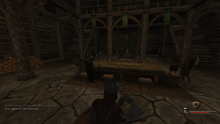
The fight in Wercheg's fortress.
against 4-5 defenders. The strategy to use depends on the style of keep you are attacking, but often the defenders have an advantage from being a floor above you.
Strategy[]
Most castles are difficult to conquer without a larger army than the garrison. A castle can be besieged with a small, experienced force, but preparation and knowledge of the castle's defenses are often required. The garrison complement inside the castle can be seen by approaching closely and holding the cursor over the castle. If you will be facing off against 50 Rhodok Sergeants backed by 100 Rhodok Sharpshooters, you may be in for a difficult or unwinnable fight; a less formidable force of 20 Trained Spearmen, 10 Militia, and 20 Crossbowmen might be easily defeated. The troops in the garrison make the difference in deciding whether to besiege the castle. If you choose to besiege, you will want someone in your party with a high surgery skill, and you may upset some heroes if you attack a castle with a smaller force than the garrison. A good target for a siege would be a castle that has recently been reclaimed by its original faction, which often have fewer than 100 defenders. Conversely, even with a large garrison, many defenders may be new recruits that are easy to defeat.
Certain towns/castles are easier to besiege and capture, while others are deathtraps for invaders (Grunwalder Castle, for example). When using Siege Towers, your troops are exposed to prolonged enemy fire while the tower moves into position, virtually guaranteeing casualties before the first soldier reaches the walls. Also, Siege Towers require much more time to build than ladders, greatly increasing the risk of an enemy army attacking you.
Some experience is required to identify weak points in a castle's defenses and the strong points that may mean disaster for your Party. Avoid long advances over ground that is in the line of fire of the castle's archers and towers. Don't attempt to climb ladders that are covered by protected enemy archers. If the opportunity presents itself, soften the defenses by sniping the enemy archers on the castle's parapets before approaching the walls with your infantry.
Attacking[]
However, a simple exploit can be used to defeat a castle with minimal losses while having an army much smaller than the castle's.
If you build up an army of 100% archers, or plenty of archers and some infantry to protect them, you can position them outside the castle and tell them to hold position. This prevents all the enemy melee troops from doing anything (except when you attack the Nords; make sure you stay far away from Nord castle walls). You may participate in shooting at the troops in the castle, especially archers because they will make mincemeat of anything that gets too close to the walls. Make sure you don't die; it will result in an early retreat and you will lose time, morale, and some troops. Keep firing arrows at the enemy, but don't forget to get the used arrows if you are at a safe distance, because you will need them. It is good idea to use the same arrow/bolt type as your troops use, because they will shoot many arrows at the tip of the ladder. Once your archers start to run out of arrows, just retreat, rebuild the ladders, and fight again with full quivers. Repeat this process until the castle either surrenders or you can defeat the remainder of the garrison.
It is possible to take many of the enemy out by yourself. If you eliminate the archers in the garrison, go up and sit at the edge of ladder with crossbow or bow, just out of reach of the enemy melee combatants, they will lower their shields to try and attack you, and you can take a few easy headshots. If you don't have enough arrows, just have your archers open fire and collect the arrows from around the edge of entryway (or collect the arrows already there and off of the fallen). You can use weapons with quite a bit of reach too (like Polearms and Two-handed Weapons), but it is harder to land critical hits and it is far easier for your opponents to block your attacks.
Always be careful when attacking the Nords or any group that has infantry armed with Thrown Weapons. If you don't know who has the thrown weapons, just send some shielded infantry in front of the ladder and wait for a little bit; it should be fairly obvious if you start to see axes, spears, or broken shields sprawled across the ground. And make sure that your shield is up when you cross the ladder, immediately fall back if something hits your shield and find who did it (so that you can execute them). Sarranid, Rhodok, and Nord infantry at the very least carry thrown weapons at some point in their careers.
A tactic you can use is to place troops with large shields in their own command group and send them up the ladder/tower first. Their shields will keep them from falling to archers, as well as soaking up arrows that would otherwise kill your weaker troops. This tactic works particularly well against Khergits, who generally have only dismounted horsemen defending their castles. It is not uncommon for tiny parties of Nords to take heavily defended castles in this manner. This can work with most higher-tier units such as Nord Huscarls, Sarranid Mamlukes, and Rhodok Sergeants.
In sieges, all friendly lords and soldiers will hear your command, even if you are just a mercenary, so you don't need to waste their troops by simply having everyone charge forward.
Defending[]
Inevitably, one of your fortifications will be attacked and you will have to defend it or risk losing it.
Ironically, one of the best defenses with archers is not to hold the walls, but to retreat back and let the constriction at the wall string out the assaulting force. Line up your archers in the courtyard and let the withering fire decimate the enemy as they attempt to close range. Use your more heavily armored infantry and cavalry to delay the enemy vanguard so the remainder get stuck waiting to engage and therefore subject to missile fire. This also limits allied troops wasting ammunition on targets since they have virtually no chance of not hitting or injuring.
A final improvement to this tactic would be to position your melee troops to make enemy assault troops expose their unshielded sides when they attempt to engage them.
In contrast, for a force of mostly melee troops, holding the breach points is very effective. At the very start of a defense, position every single man at your disposal to hold position right against the breach. You should also order them to stand closer together, this creates a very dense group of soldiers that the enemy struggles to break into thus turning their assault into a trickle of enemies who have at most one swing before they are killed.
An additional tactic involving two-handed weapons can make defense considerably easier. Equip a strong, fast two-handed weapon such as a War Cleaver or a Great Sword, order your troops to crowd the siege ladder, place yourself behind one of the merlons next to the ladder, and mercilessly cut down incoming foes with overhead swings. A high enough Power Strike skill and strength, combined with a powerful weapon and high proficiency, will ensure that even the toughest enemies will fall in a single strike.
With these tactics, you can defeat an army over 500 with around 70 men.
Note, however, that you must not stay within the group as you could get trapped in a wide opening with many angry archers firing at you, immediately pull back as your men rush to that position. From this point, you can gain some excellent archer practice as the attackers are virtually standing still on the ramp. If you run out of ammo, you can gather projectiles or arrows. Also, defenses breached by wide ramps will make this tactic less effective as the attacker can put more troops into the breach which may clear space enough for a foothold.
In the end, defense is all about exploiting defensive constrictions to achieve local numerical superiority.
With Fire & Sword[]
In With Fire & Sword, there are no siege towers, and only ladders are available. Before you begin to attack and put the ladders up, you can decrease the number of men inside by poisoning the water supply. The success of this action will depend on your tactics, the more points you have, the less chance you will be caught, but if you fail, you have to fight your way out. You can attempt to poison the water again, but not within the same day.
After the poisoning of the water, you can choose to attack, wait until tomorrow, attempt to break through the gates (only if your besieging a town with a large enough party), or simply blow a hole into the walls with explosives. You may also see the commander of the castle you are besieging, when you speak to him, it might give you the option to bribe him to open the gates, depending on your persuasion, but comes at the cost of about 20,000 thalers.
If their numbers are dwindling and yours are massive, you can persuade the commander to open the gates and let your troops in take the town/fortress with guarantees of mercy for the defenders (if your persuasion is high enough).
The presence of deadly firearms in With Fire & Sword makes holding the walls an extremely dangerous exercise, as enemies will swarm the walls from several sides, and stray bullets pose a continuous threat. An alternative tactic is to give up the walls as soon as the battle begins, immediately retreat to the far end of the castle courtyard and hide your force in a corner behind buildings. The retreat is likely to cost the lives of many of your units, but the position you're retreating to will be a lot easier to hold. Enemy troops will have to run a far distance from their spawn point to reach your troops, usually only coming from one or two easily-defendable directions, and they will not get the opportunity to shoot at you from afar. Bottlenecks such as staircases or building corners tend to force enemies to run single-file, so the assault will be very spread out with enemies reaching you in small groups. Keep your infantry at the back, and await the enemies with a line of musketeers or pistol-armed cavalry. If done right, the enemy will have no clear line of sight to your troops before they have rounded the corner of the building you are hiding behind - where they will be greeted by a massive volley of bullets from your army. Especially in cities, where masses of enemy units will easily be stuck between buildings, this tactic can allow a small force of Musketeers and Reiters to hold against a siege of several hundred enemies.
After the siege[]
In the same way as after a normal battle, you may take any items from the castle or town, and you may also get some prisoners. You can also rescue prisoners held at the castle or town and hire them into your own army.
If you have joined a faction, you may choose to ask your king for the land. After a short time, you will either receive it or not. If you asked the king for the land and did not receive it, you may renounce your oath and fief (you will not get the fief you just took either), or renounce your oath and take every fief including the one you just took, causing you to join the rebel faction, or you can accept the king's decision and take a payout (default is 900 denars).
The prosperity of the fief will also decrease slightly.
If you are already part of the rebel faction, you will just take the castle for yourself.
Mount & Blade II: Bannerlord[]
In Mount&Blade II: Bannerlord, sieges have been greatly expanded. New siege tools are available to the player, such as battering rams, catapults, ballistae, fire catapults and fire ballistae. Ladders and siege towers also return from previous games. There are defensive holes through which soldiers can throw rocks down to crush enemies and ladders can actually be climbed instead of the walking animation being used and the player slowly scaling up. Defensive catapults and ballistae can also defend the castle from attackers.

